

buttons
clickable control panel
> examples buttons
> edit buttons
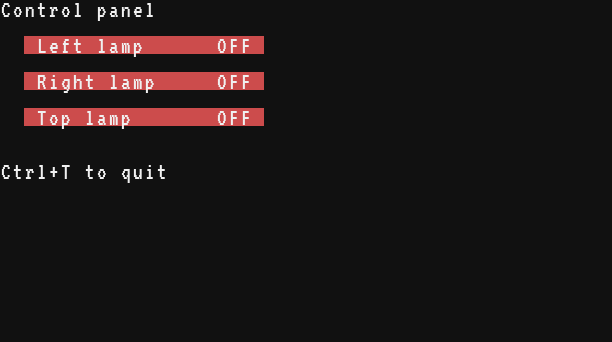
A control panel: three buttons on the screen, each one switching a redstone output on and off. Click them in the terminal, or right-click them on a monitor touching the computer. Every control room starts like this.
What to build
- Redstone Lamps (or doors, Create Clutches, anything driven by redstone) on the left, on the right and on top of the computer.
- If you like, a monitor against the computer: right-click its screen to press the buttons from the world, without opening the terminal.
On the Tube Computer, the paper of the teletype cannot be clicked, but a monitor works. On the phosphor screens of the Transistor Mainframe and the Minicomputer the colours do not show, but the ON and OFF texts do.
How it works
local buttons = {
  {label = "Left lamp", side = "left"},
  {label = "Right lamp", side = "right"},
  {label = "Top lamp", side = "top"},
}
local X = 3
local WIDTH = 20
Each button is a small table: its text and the side it drives. The program later adds its row (y) and its state (on): a table can get new fields at any time.
The draw function paints one button: it moves the cursor with term.set_cursor(), picks a green or red background with term.set_bg(), and writes the label padded with spaces (string.rep()) so that every button is exactly WIDTH characters wide. This is what it draws:
local X, WIDTH = 3, 20
local function draw(b)
  term.set_cursor(X, b.y)
  local state = "OFF"
  if b.on then
    state = "ON"
    term.set_bg(term.colors.green)
  else
    term.set_bg(term.colors.red)
  end
  local text = " " .. b.label
  write(text .. string.rep(" ", WIDTH - #text - #state - 1) .. state .. " ")
  term.set_bg(term.colors.black)
end
term.clear()
term.set_cursor(1, 1)
print("Control panel")
draw({label = "Left lamp", y = 3, on = true})
draw({label = "Right lamp", y = 5, on = false})
draw({label = "Top lamp", y = 7, on = false})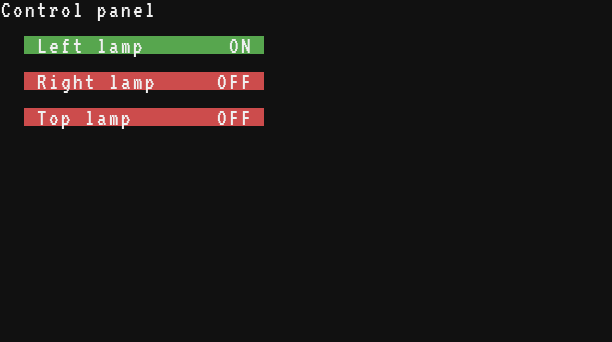
draw uses X and WIDTH, which are local to the whole file: that is allowed in Brass. A function cannot use the local variables of another function, which is why the button comes in as a parameter.
local e = os.pull_event("click")
for i = 1, #buttons do
  local b = buttons[i]
  if e.y == b.y and e.x >= X and e.x < X + WIDTH then
    b.on = not b.on
    rs.set(b.side, b.on)
    draw(b)
  end
end
os.pull_event() with "click" waits for a click. The event tells the character clicked (e.x, the column, and e.y, the row, from 1 at the top left), the pixel (e.px, e.py), the mouse button and where it came from (e.source, "terminal" or "monitor"). A click is on a button when it is on its row and between its first and last column. The button then flips, drives its side, and is drawn again.
Ideas
- A fourth button: add
{label = "Back door", side = "back"}to the list. The rows follow by themselves. A push button that sends a short pulse instead of switching, for a bell or a Create Mechanical Press:
Brass if b.pulse then rs.set(b.side, true) sleep(0.2) rs.set(b.side, false) else b.on = not b.on rs.set(b.side, b.on) draw(b) endwith
pulse = truein the table of that button.- Drive Create Redstone Links instead of sides, to reach machines far away:
link.set(). - Show live values next to the buttons (a stock, a speed), redrawn by a timer: see Events for waiting for clicks and timers at the same time.
- The control panel recipe builds a bigger panel for a wall of monitors.
The program
-- Clickable buttons: click them in the terminal, or right-click them
-- on a monitor touching the computer. Each one switches an output:
-- put lamps (or doors, Create clutches...) left, right and on top.
local buttons = {
  {label = "Left lamp", side = "left"},
  {label = "Right lamp", side = "right"},
  {label = "Top lamp", side = "top"},
}
local X = 3  -- first column of the buttons
local WIDTH = 20

-- Draws one button: green when on, red when off.
local function draw(b)
  term.set_cursor(X, b.y)
  local state = "OFF"
  if b.on then
    state = "ON"
    term.set_bg(term.colors.green)
  else
    term.set_bg(term.colors.red)
  end
  local text = " " .. b.label
  write(text .. string.rep(" ", WIDTH - #text - #state - 1) .. state .. " ")
  term.set_bg(term.colors.black)
end

term.clear()
term.set_cursor(1, 1)
print("Control panel")
for i = 1, #buttons do
  buttons[i].y = 1 + i * 2
  buttons[i].on = false
  draw(buttons[i])
end
term.set_cursor(1, 10)
print("Ctrl+T to quit")
while true do
  -- e.x, e.y: the character clicked (1, 1 is the top left)
  -- e.source: "terminal" or "monitor"
  local e = os.pull_event("click")
  for i = 1, #buttons do
    local b = buttons[i]
    if e.y == b.y and e.x >= X and e.x < X + WIDTH then
      b.on = not b.on
      rs.set(b.side, b.on)
      draw(b)
    end
  end
end